
Configuring Logger & ECU Communication for Bosch Racecon
There are the two different possibilities, RS232 and Ethernet, to set up communication for a Bosch Logger or ECU.
First, open the RaceCon setup and make sure in your Project window there is a listed telemetry. If not, you can add a telemetry by going to your Toolbox, then Data logging systems and click and drag the telemetry into your car display. It will then appear also in your project window. Double click to open the menu and navigate to the Settings tab in the bottom task bar.
To set up a RS232 communication:
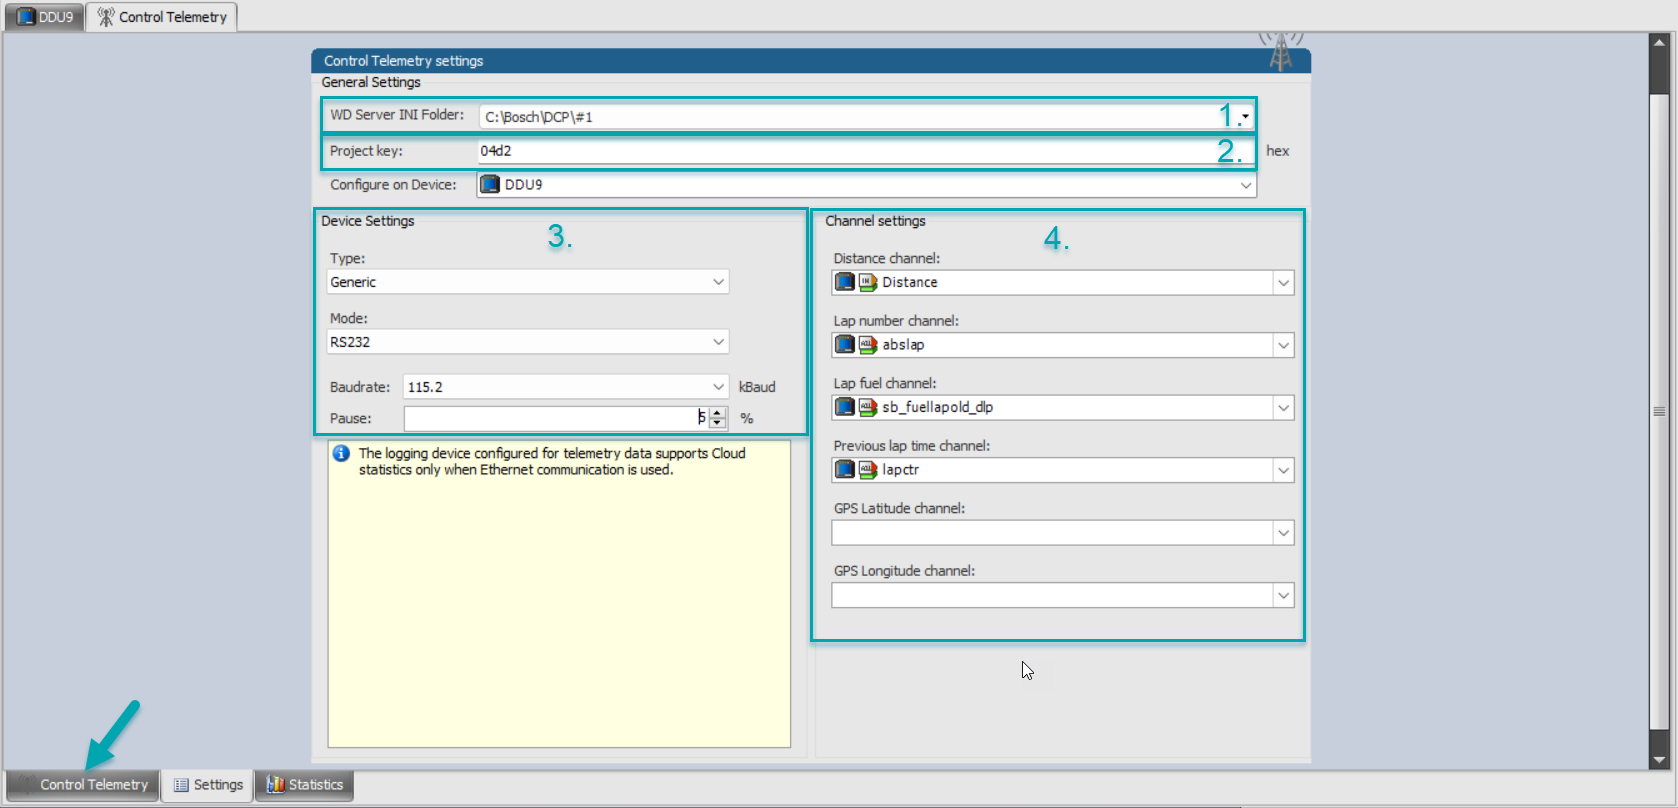
1. Select the correct file path to save the DCP(.ini) files which will be newly created any time the logger will be flashed. The file path here needs to be identical to your WDServer settings either for a one car team in the Workdesk Settings or for the individual configuration of each car. When using subfolders for each car, they need to match the WDServer and the Control Studio settings of sorting them by race, chassis or port number when you wish to use the Automatic DCP File Synchronisation.
2. This project key is needed for your Telemetry Device Configuration.
3. Leave type on generic and choose RS232 as Mode in the dropdown menu. Fill in the Baudrate corresponding to your telemetry device. Be aware of the unit being already in kilo(1000!)Baud. Make sure the Pause is at least at 5% or higher, but be aware the higher the Pause the less data will be sent.
4. Select the according channel name of your data logger/car for the description of each needed channel.
Once settings have been done, navigate back to the tab telemetry on your bottom task bar and choose the telemetry channels you want to add to your stream.
To set up a Ethernet communication:
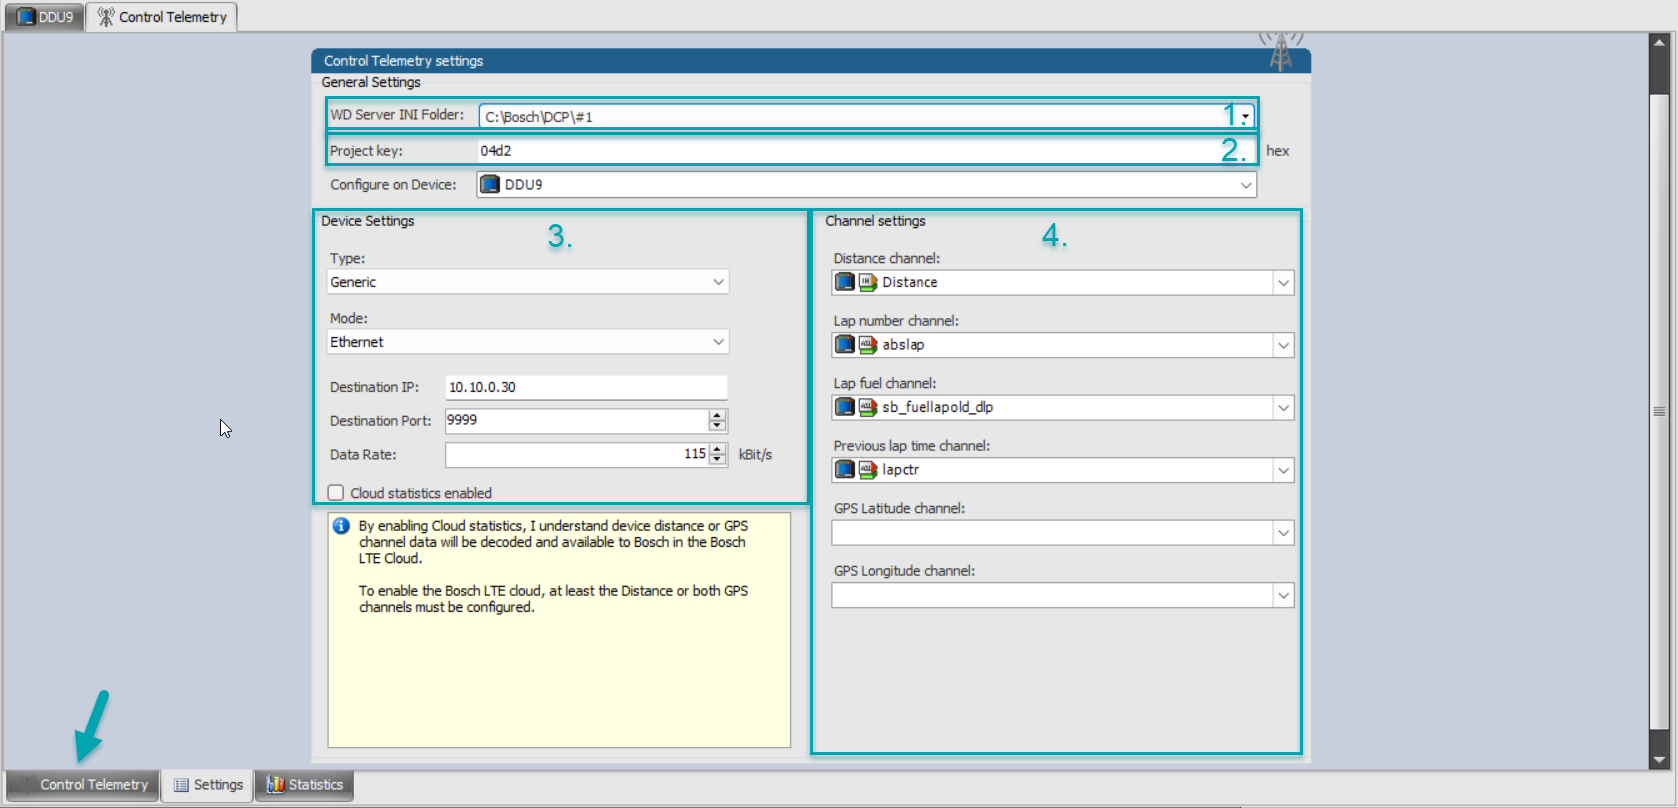
1. Select the correct file path to save the DCP(.ini) files which will be newly created any time the logger will be flashed. The file path here needs to be identical to your WDServer settings either for a one car team in the Workdesk Settings or for the individual configuration of each car. When using subfolders for each car, they need to match the WDServer and the Control Studio settings of sorting them by race, chassis or port number when you wish to use the Automatic DCP File Synchronisation.
2. This project key is needed for your Telemetry Device Configuration.
3. Leave the Type on generic and choose Ethernet for Mode. Fill in 10.10.0.30 for Destination IP and you corresponding output port number as Destination Port. Set the according Data Rate, be aware of the unit kBit/s.
4. Select the according channel name of your data logger/car for the description of each needed channel.
Once settings have been done, navigate back to the tab telemetry on your bottom task bar as indicated by the arrow and choose the telemetry channels you want to add to your stream in the existing Group folder or add a new group folder by right clicking in the window. Double clicking on existing channels or using the Edit or Add channel button, you can choose between fast or slow channel rates, given your requirements.