
Configuring Bosch WDServer
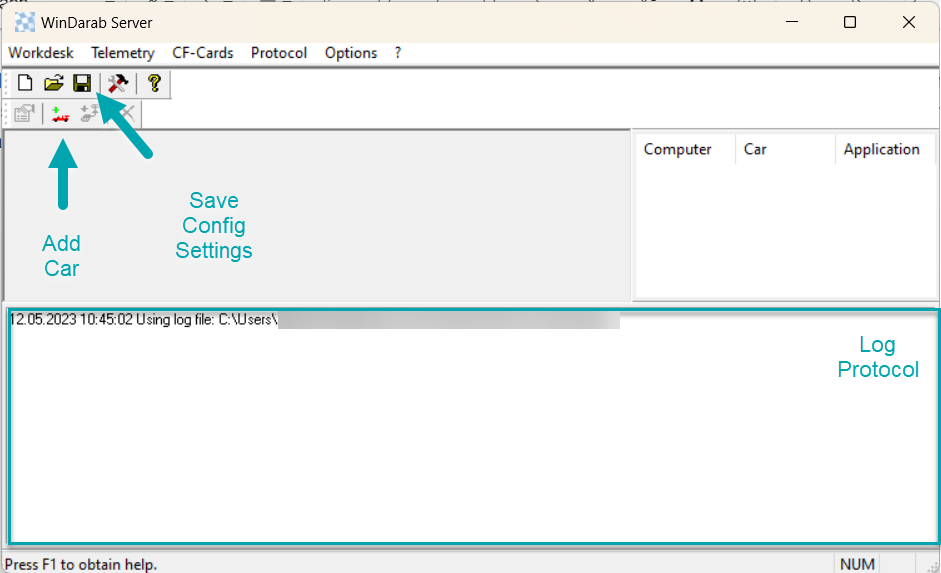
Below is the basic layout of the WDServer displayed. To save the current configuration either click on the save icon in the central task bar or click Workdesk at the upper task bar where you also have the option to change the name of your current configuration or to open other previous configuration.
Have more than one car? Please go further down in this article to find more detailed instruction for the configuration process.
One Car Team
Step 1: Adding a Car
To add a car click on the small car icon on the lower task bar and a car settings window will open. If you already have a car listed in your WDServer that you would like to change configuration for, double click on the window containing the team name information or the port information.
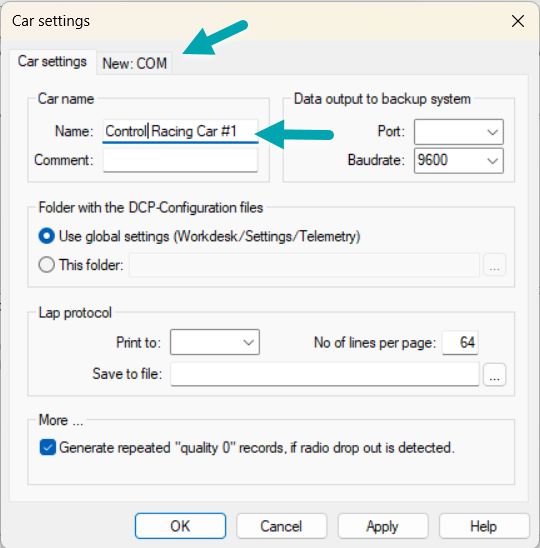
Type in your team name and preferably your starting/race number. Click apply below before changing to the New:COM tap indicated by the arrow.
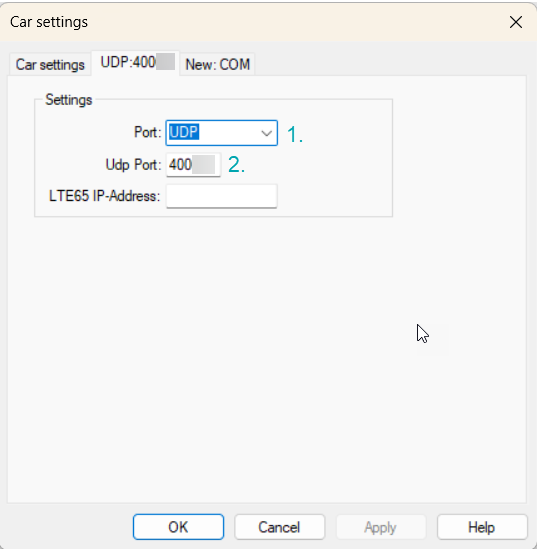
1. Type in or select from the drop down menu UDP
2. Type in port number according to your device. This information can be found in Control Studio or in our article Where do I find my port number?

Click on Apply and close with Ok the Car settings window. Save you current configuration.
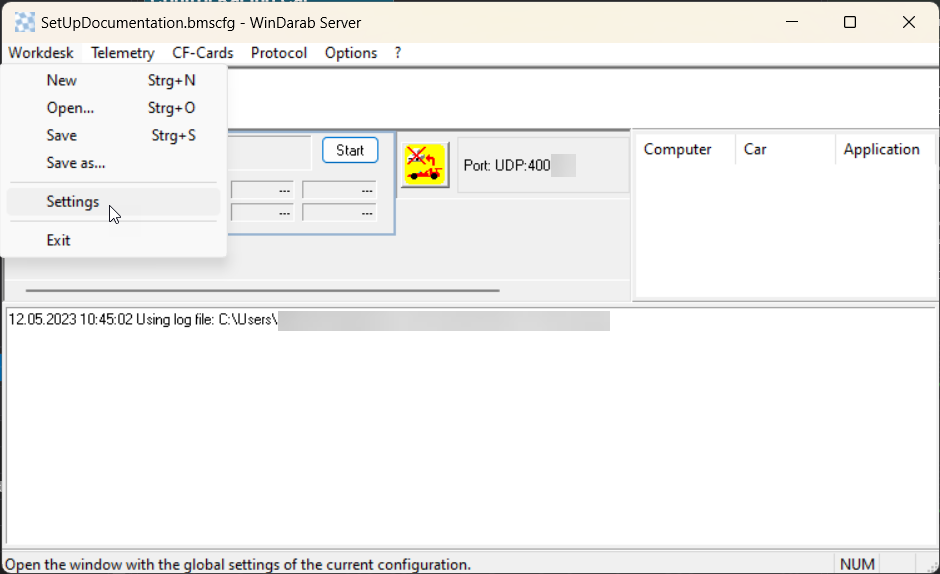
Go to Workdesk and Settings to set up the correct file path for your DCP(.ini) files.

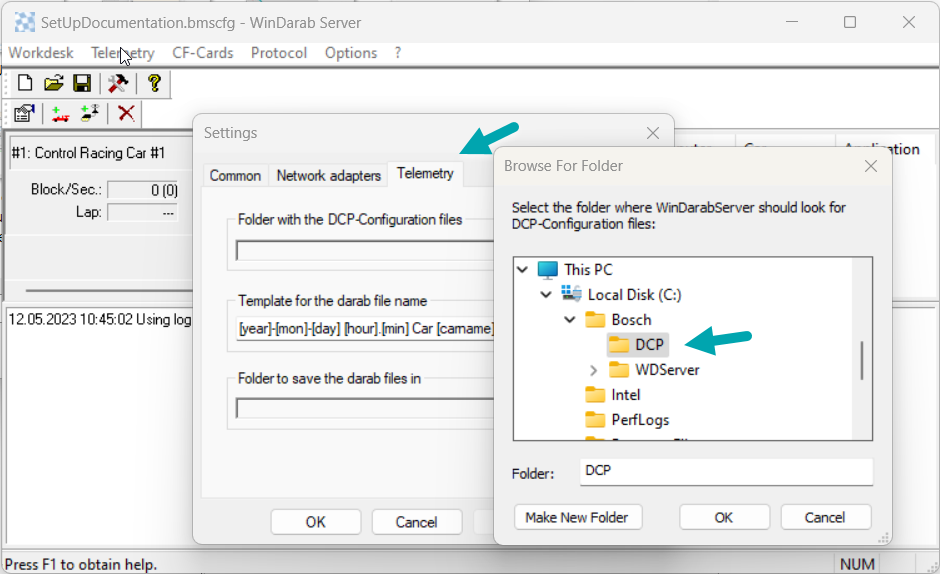
Select the tap of telemetry and browse to C:\Bosch\DCP. Select Apply in Settings and close with OK the window.

Note: If the same Laptop which is configuring WDServer is also flashing the logger and therefore creating new DCP files, make sure the path in Racecon matches the path in WDServer. In this case C:\Bosch\DCP. Use this option only if you are using/flashing only one car.
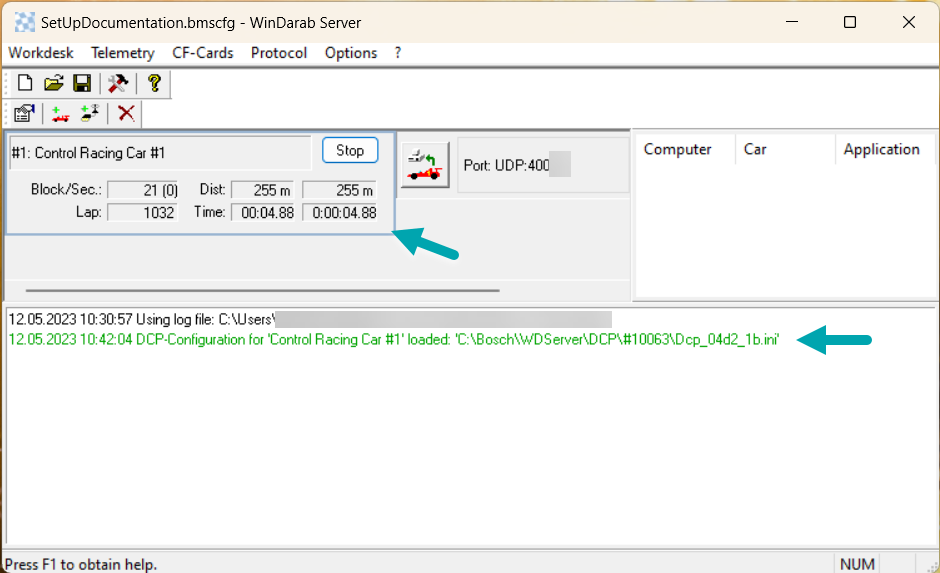
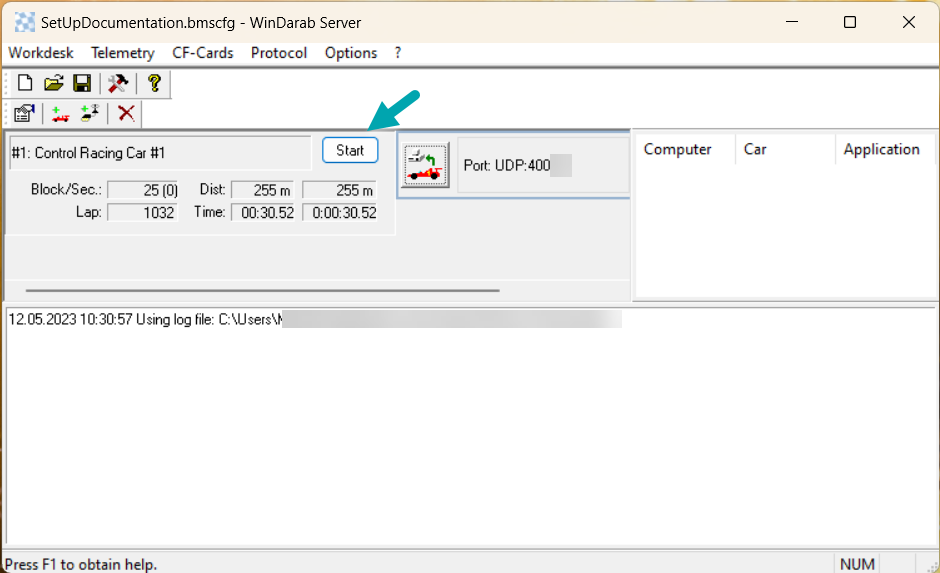
To start the telemetry of one car, click on the Start button in the car window.

When a successful connection is made, time will start running synchronised in both time windows and the log protocol will show a green message of the successfully loaded DCP file.
Multi-Car Team
To add a car click on the small car icon on the lower task bar and a car settings window will open. If you already have a car listed in your WDServer that you would like to change configuration for, double click on the window containing the team name information or the port information.
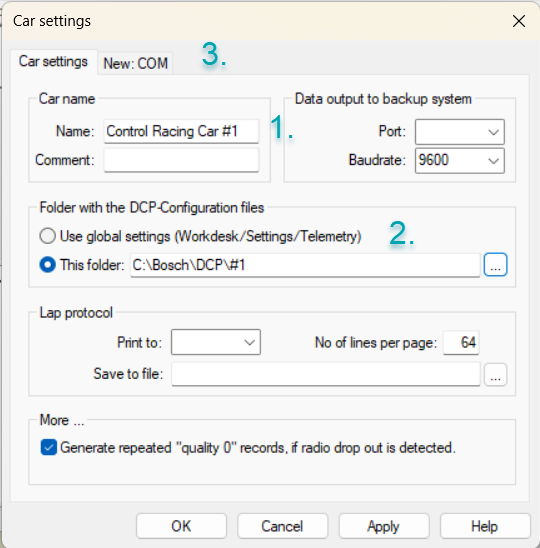
1. Type in the name of your team or car with the according starting/race number, chassis number or port number of your telemetry device.
2. Check the box for browsing a defined folder path for the DCP files and choose either the folder of the according race number, chassis number or port number depending on your settings in Control Studio for the Automatic DCP File Synchronisation in the C:\Bosch\DCP folder. Click the Apply button below.
3. To set up the port configuration, select the window of New:COM on the top.
1. Type in or select from the drop down menu UDP
2. Type in port number according to your device. This information can be found in Control Studio or in our article Where do I find my port number?
Click on Apply and close with Ok the Car settings window. Save you current configuration.
Go to Workdesk and Settings to set up the correct file path for your DCP file structure built by Control Studio.
Select the tap of telemetry and browse to C:\Bosch\DCP. The Automatic DCP File Synchronisation will create additional folders with race, chassis or port number in the folder set up here. Select Apply in Settings and close with OK the window.
To start the telemetry of one car, click on the Start button in the car window.
When a successful connection is made, time will start running synchronised in both time windows and the log protocol will show a green message of the successfully loaded DCP file.
