
Configuring CAN Receive & Modem Control in MoTeC Dash Manager
To set up CAN Receive from Modem:
For this operation you will have been supplied with a DBC file by the Control Support.
First Step is to import the DBC file. To do this, you open the Dash or ACL Manager you have in use for your vehicle and navigate to Connections and then Communication menu on the top task bar.
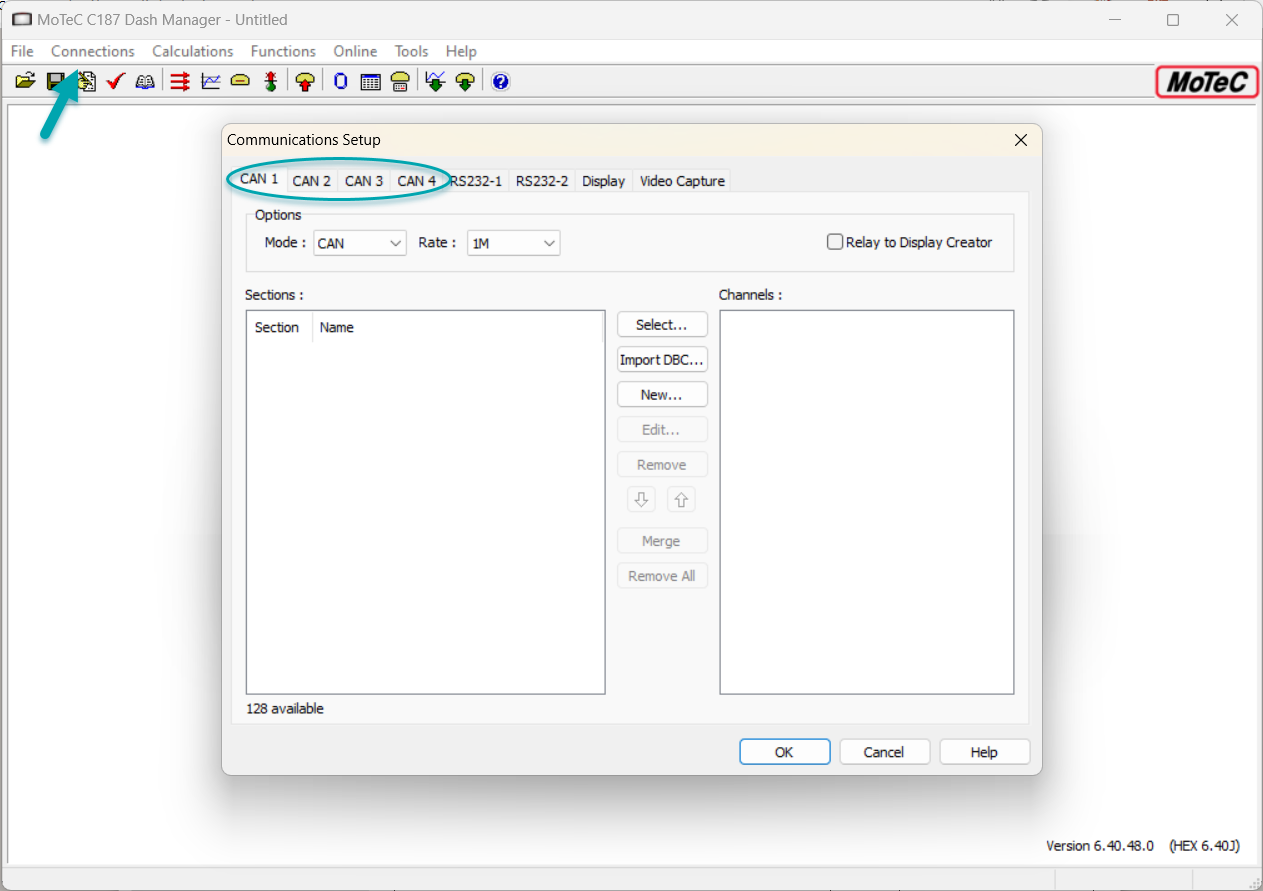
Select the tab for the specific CAN port you intend to use, as defined by your wiring schematic. Click the Import DBC button and open the DBC file supplied by Control.
Locate the TLM_Control message, deselect it and all channels within. Click ok. You will now be able to log device channels and add them to the telemetry table for transmission.
To set up Modem Control:
1. Step: Create Modem Control User Conditions
The approach to creating these channels will differ depending on your requirements, it is anticipated that a combination of Timers, Channel Maths, User Conditions and Counters could be used to arrive at a set of Modem control channels and as such the creation of these channels is outside the scope of this document.
2. Step: Transmit Control Channels
To transmit control channels, click new in your Communications Setup and set device to Transmit Message. Set the Base Address to 610 and the Transmit Rate to 10Hz.
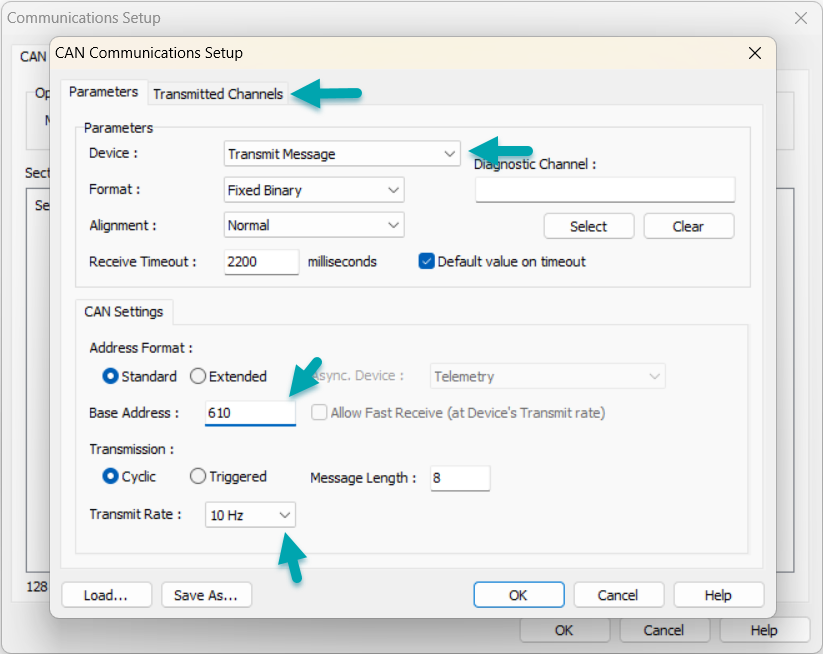
Click on the upper tab of Transmitted Channels and select each channel you wish to send to the modem and position in the CAN frame according to the supplied DBC file. Click Ok.
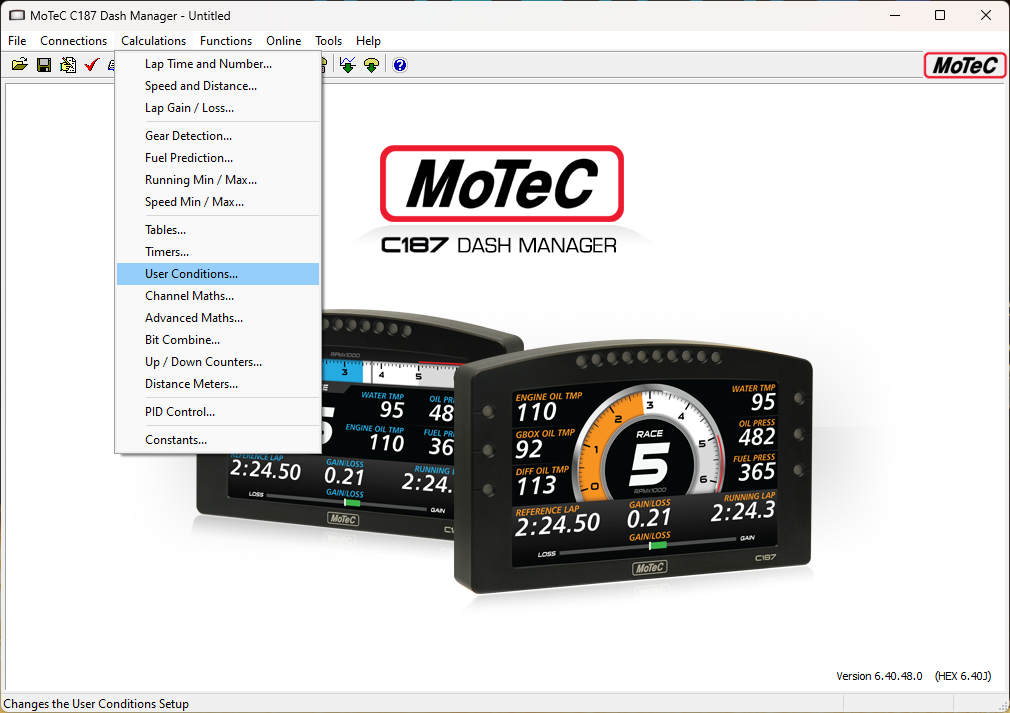
To add a TLM_Suppress_Transmit channel and send it over CAN, open the Dash Manager and open the User Conditions menu under Calculations and click Add.
Configure the channels you which to be met in order to send telemetry, for example Engine speed greater than 0, or an alarm button being pressed (recommended to allow for easy testing of telemetry). Configure the condition that needs to be met for telemetry to stop, this should include all the conditions set in the previous step being false for a specific time period to allow the telemetry to run for some time after the vehicle has stopped, for example during a pit stop, an example is shown below.
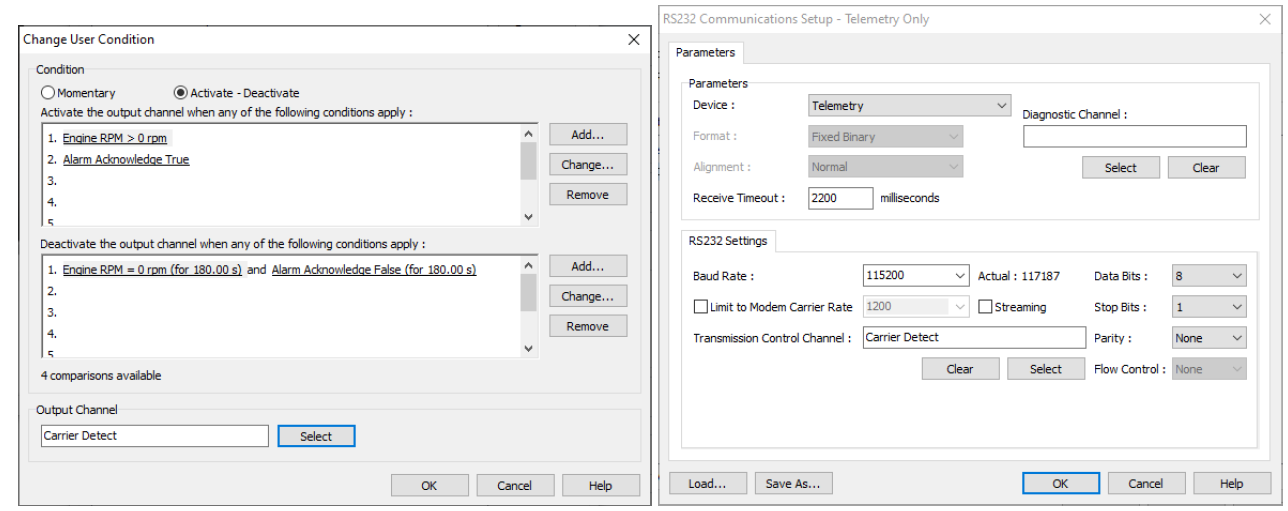
Set the output channel to an unused channel, for example the “Carrier Detect” channel. Click ok. Navigate to the Communications -> Connections menu. Locate the “Telemetry Only” setup from the initial settings and click Edit. Set the “Transmission Control Channel” to the channel configured, here Carrier Detect and click OK.